I love how sheering looks and I had to make a dress with it. Here is the final outcome and steps for how to make your own!
What you need:
~1 yard fabric
Thread
Elastic thread
Bias Tape
1 large button
Trim (Optional)
1. Cut out pattern pieces.
Pattern Page 1
Pattern Page 2
I have included a pattern for 18 months. You can size it up or down. Or make one yourself by using a shirt that fits them. I made my bodice pattern by following this great tutorial--scroll down a little. You have to make one change. Add some length to the bottom part of the bodice. So, you are making 4 sides longer like this:
Also, cut out a skirt portion: 34"x16". If you are making your own pattern use my equation in this post to figure out how long to cut width (part around waist). Look under "How to measure cut of fabric around waist."
2.Put bodice front and back, right sides together. Match up shoulders and side seams, sew them up.
3. Take one sleeve at a time fold it in half, so right sides are together, sew up seam.
Iron up the edge of sleeve (the part that doesn't attach to bodice) to get rid of unfinished edge. If you want to add trim watch this short video:
4. Sew a gathering thread across top part of sleeve (that attaches to bodice) and pull until it is same size as arm hole in bodice:
Sew sleeve into bodice. Make sure right sides are together!
Now you have this:
5. On bodice back make a 3" cut right down the middle and cut off edge to round it off (this affects the look, so make sure you do it). At this point, I put the bodice over my little girl's head to make sure it fit, maybe you want to do the same. You can look at it and see if you think it will fit over you little girl's head. If not, cut until it will fit.
6. Attach bias tape all around neck line and around the cut you just made. Watch this:
7. Sew your button (I used a fabric button) on one side of back. Sew a piece of bias tape or fabric or trim on other side to fit around button. I used the trim I had. I sewed it to itself first (second pic), then sewed it onto the dress. I thought it made it look classy.
8. For skirt, sew up side seam. Finish off bottom hem. I added trim to this part. Watch video for sleeve trim if you need to see it again. Don't forget to top stitch!
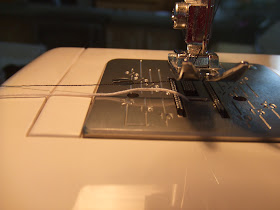
9. Now for the sheering...it is sooooooo easy! Don't be afraid! Replace bobbin thread with elastic thread. Just hand wrap elastic thread around bobbin so it sits on there nicely, not tight, not loose. Normal thread on top.
Now, you are going to sew 10-12 rows (whatever your preference I did 12 for the black and white dress, 10 for purple seen below) around the the top of skirt portion of dress. Watch the video:
If you want to add trim to the middle, like I did, add it now. You can just baste it on.
10. Sew together bodice and skirt. Make sure right sides are together.
11. If you want to embellish with a flower like I did, I did a basting stitch on the flat side of the trim, pulled it into circles, and sewed it together, adding a blingy button in the middle. I sewed it onto the dress and added a little fabric glue to get it to lay just how I wanted it.
Now you are done! You will see in the purple dress I added a ruffle instead of the flower. I didn't like it as much so I didn't include instructions. It was hard to do and added complexity. Maybe I did it a wrong way.
Also, the black and white dress is for 18 months and my daughter is only about 13 months in the picture (that's why the dress is a little big--wanted her to grow into it). The purple dress is 12 months (that's why it fits so much better).


