danielle's background
Showing posts with label sewing. Show all posts
Wednesday, September 26, 2012
Taking Notes Adult Skirt
After making this skirt for Brynn it was time to make one for myself. Here is a link to the tutorial. It turned out so cute and I love the fabric I found. It is classy yet kind of original I think. I love the deep mustard yellow with the so dark brown that you could probably pull off a black top too.
Oh and I should mention the top I've had for a while (pic below is 4 years ago) but the buttons are too small for the holes and they pop out all the time! You can see them open in the pic below on my tummy. Solution: I added hooks to keep it together! I also ran the hooks up to my high chest so I didn't have to wear an undershirt then pined the ties up to cover the hooks that showed and sewed it down. Wa la...an awesome outfit!
Wednesday, September 19, 2012
$1 Shirt
When I saw this I knew I had to try it. A dollar DI Men's XL shirt into this...I had nothing to lose trying it! I followed the tutorial exactly. At the end I wasn't a fan of the neckline so I added two rows of sheering:

I liked that with this neckline, I didn't have to wear an undershirt. My favorite part of her design was how she gathered the side. It looks cute (ignore the thread I hadn't cut yet):
For a buck and a new shirt it isn't too shabby!
Tuesday, September 11, 2012
Shirt, Skirt and Headband Flower
I saw this skirt and had to make it. It is an awesome tutorial! I wanted to buy fabric just like the one they had but I saw this one with black dots and I fell in love with it! I think it turned out well. I used a black zipper and thread to add a little pop. I made it a little big for her so she could grow into it.
The shirt I made my own pattern but it is super hard to get her arms through, so I'm not going to post a tutorial on it. I will try adding a side zipper and see if that works because the shirt turned out so cute!
I will post a tutorial on the flower soon.


sdfs
The shirt I made my own pattern but it is super hard to get her arms through, so I'm not going to post a tutorial on it. I will try adding a side zipper and see if that works because the shirt turned out so cute!
I will post a tutorial on the flower soon.
sdfs
Thursday, August 30, 2012
Sheered Dress
I love how sheering looks and I had to make a dress with it. Here is the final outcome and steps for how to make your own!
What you need:
~1 yard fabric
Thread
Elastic thread
Bias Tape
1 large button
Trim (Optional)
1. Cut out pattern pieces.
Pattern Page 1
Pattern Page 2
I have included a pattern for 18 months. You can size it up or down. Or make one yourself by using a shirt that fits them. I made my bodice pattern by following this great tutorial--scroll down a little. You have to make one change. Add some length to the bottom part of the bodice. So, you are making 4 sides longer like this:
Also, cut out a skirt portion: 34"x16". If you are making your own pattern use my equation in this post to figure out how long to cut width (part around waist). Look under "How to measure cut of fabric around waist."
2.Put bodice front and back, right sides together. Match up shoulders and side seams, sew them up.
3. Take one sleeve at a time fold it in half, so right sides are together, sew up seam.
Iron up the edge of sleeve (the part that doesn't attach to bodice) to get rid of unfinished edge. If you want to add trim watch this short video:
4. Sew a gathering thread across top part of sleeve (that attaches to bodice) and pull until it is same size as arm hole in bodice:
Sew sleeve into bodice. Make sure right sides are together!
Now you have this:
5. On bodice back make a 3" cut right down the middle and cut off edge to round it off (this affects the look, so make sure you do it). At this point, I put the bodice over my little girl's head to make sure it fit, maybe you want to do the same. You can look at it and see if you think it will fit over you little girl's head. If not, cut until it will fit.
6. Attach bias tape all around neck line and around the cut you just made. Watch this:
7. Sew your button (I used a fabric button) on one side of back. Sew a piece of bias tape or fabric or trim on other side to fit around button. I used the trim I had. I sewed it to itself first (second pic), then sewed it onto the dress. I thought it made it look classy.
8. For skirt, sew up side seam. Finish off bottom hem. I added trim to this part. Watch video for sleeve trim if you need to see it again. Don't forget to top stitch!
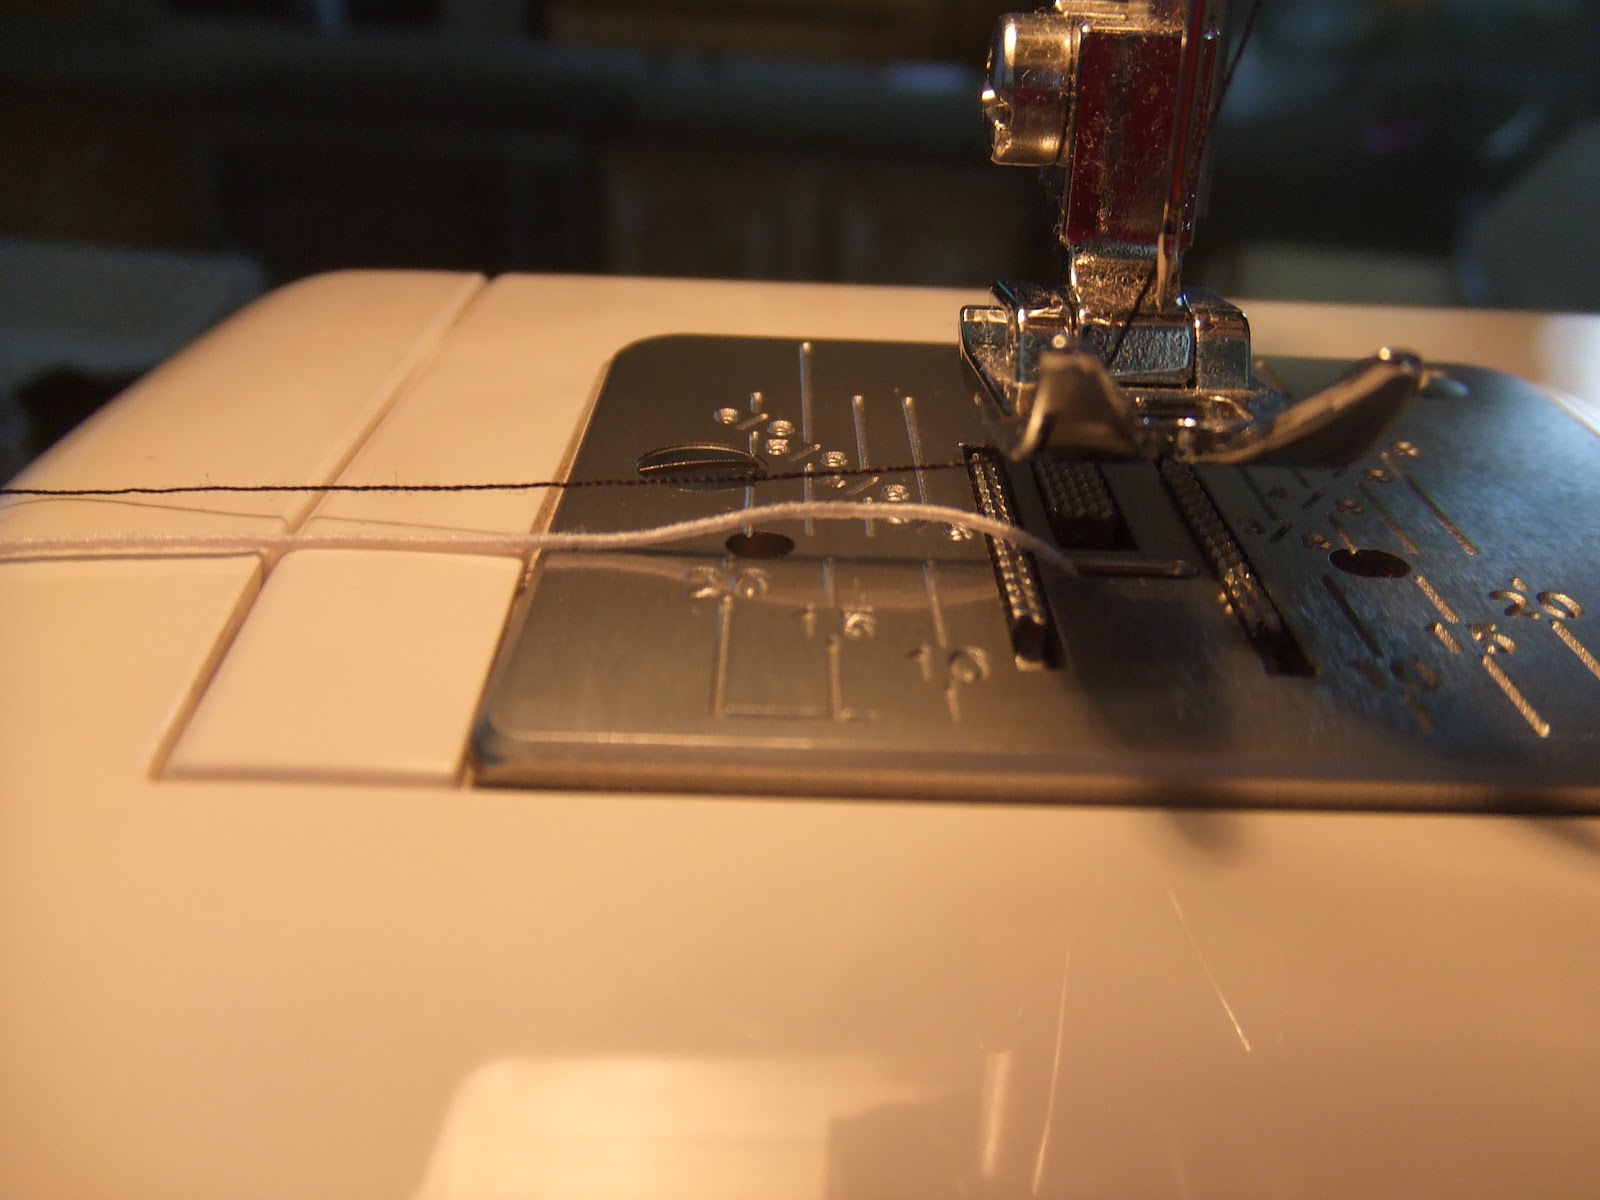
9. Now for the sheering...it is sooooooo easy! Don't be afraid! Replace bobbin thread with elastic thread. Just hand wrap elastic thread around bobbin so it sits on there nicely, not tight, not loose. Normal thread on top.
Now, you are going to sew 10-12 rows (whatever your preference I did 12 for the black and white dress, 10 for purple seen below) around the the top of skirt portion of dress. Watch the video:
If you want to add trim to the middle, like I did, add it now. You can just baste it on.
10. Sew together bodice and skirt. Make sure right sides are together.
11. If you want to embellish with a flower like I did, I did a basting stitch on the flat side of the trim, pulled it into circles, and sewed it together, adding a blingy button in the middle. I sewed it onto the dress and added a little fabric glue to get it to lay just how I wanted it.
Now you are done! You will see in the purple dress I added a ruffle instead of the flower. I didn't like it as much so I didn't include instructions. It was hard to do and added complexity. Maybe I did it a wrong way.
Also, the black and white dress is for 18 months and my daughter is only about 13 months in the picture (that's why the dress is a little big--wanted her to grow into it). The purple dress is 12 months (that's why it fits so much better).
Monday, June 18, 2012
Frosted Pane Skirt
Sewing in no man's land is such a great blog! This is my Frosted Pane Skirt. I like to call mine the Cotton Candy Skirt because of the colors of the fabric I used. Here is a link to the skirt tutorial. I thought I would include a picture of how I added on the lining with tulle. I actually sewed my lining into the waist seam. I just liked it better there. I also didn't do the tiering.
My word of advice is to cut really long strips of tulle. Mine were shorter and I ended up making a fourth layer of really long tulle because mine wasn't gathered enough for my taste. I think it turned out so cute!
Thursday, May 17, 2012
Sheering Measurements & How To
I read many how to's on sheering but none of them included the length of fabric to cut when you want to make a skirt. So I figured out the math and that is mainly what I wanted to share today. I also included a brief how to on sewing sheering.
How to measure cut of fabric around waist:
1. Measure largest part of hips/waist--elastic needs to get over this part.
2. Take that number divide by 3
3. Add that answer to the largest area of your hips/waist (from step one)
4. Add 2" for side seams (or less if you want to make side seams smaller).
Here's an example:
1. 36" waist
2. 36"/3 = 12.
3. 12+36=48
4. 48+2=50
So, the example skirt would be 50 inches for the waist and you would make the length however long you wanted the skirt to be.
These measurements worked out perfectly for a skirt I made for me and a dress I did for my daughter (which I will share soon--for a dress I measured her shoulders, since that was the largest part the dress needed to get over).
How to sew sheering (after sewing up side seam, hemming bottom of skirt, and hemming or serging top):
1. Wrap elastic around bobbin loosely. Use your normal thread on top. I kept tension at what it always is when I sew and it turned out great.
2. Sew around top of waist like you do with normal thread, about a half inch down from the top of waist. Remember to back stitch at the beginning and end--DO NOT CUT THREAD when you have gotten back to where you started.
In this picture disreguard the lining on the right hand side of the picture, it did not work out well and I will not do it again, pick a fabric that isn't see through, or if it is, I will have another tutorial on how to sew a skirt with sheering and lining--I figured out the right way!
3. Release presser foot and slide fabric to where you want to start your next line (I do it about 3/8" apart). Back stitch, go around, back stitch then go to the next line again.
4. Repeat the process until you have enough rows for your liking. I did about 14, don't do less than 5.
Subscribe to:
Posts (Atom)