danielle's background

Thursday, August 30, 2012

Sheered Dress


I love how sheering looks and I had to make a dress with it. Here is the final outcome and steps for how to make your own!

What you need:
 ~1 yard fabric
Thread
Elastic thread
Bias Tape
1 large button
Trim (Optional)

1. Cut out pattern pieces.
Pattern Page 1
Pattern Page 2
I have included a pattern for 18 months. You can size it up or down. Or make one yourself by using a shirt that fits them. I made my bodice pattern by following this great tutorial--scroll down a little. You have to make one change. Add some length to the bottom part of the bodice. So, you are making 4 sides longer like this:
Also, cut out a skirt portion: 34"x16". If you are making your own pattern use my equation in this post to figure out how long to cut width (part around waist). Look under "How to measure cut of fabric around waist."

2.Put bodice front and back, right sides together. Match up shoulders and side seams, sew them up.

3. Take one sleeve at a time fold it in half, so right sides are together, sew up seam.

Iron up the edge of sleeve (the part that doesn't attach to bodice) to get rid of unfinished edge. If you want to add trim watch this short video:
 Don't forget to top stitch:

4. Sew a gathering thread across top part of sleeve (that attaches to bodice) and pull until it is same size as arm hole in bodice:
Sew sleeve into bodice. Make sure right sides are together!

Now you have this:
5. On bodice back make a 3" cut right down the middle and cut off edge to round it off (this affects the look, so make sure you do it). At this point, I put the bodice over my little girl's head to make sure it fit, maybe you want to do the same. You can look at it and see if you think it will fit over you little girl's head. If not, cut until it will fit.

6. Attach bias tape all around neck line and around the cut you just made. Watch this:
7. Sew your button (I used a fabric button) on one side of back. Sew a piece of bias tape or fabric or trim on other side to fit around button. I used the trim I had. I sewed it to itself first (second pic), then sewed it onto the dress. I thought it made it look classy.

8. For skirt, sew up side seam. Finish off bottom hem. I added trim to this part. Watch video for sleeve trim if you need to see it again. Don't forget to top stitch!
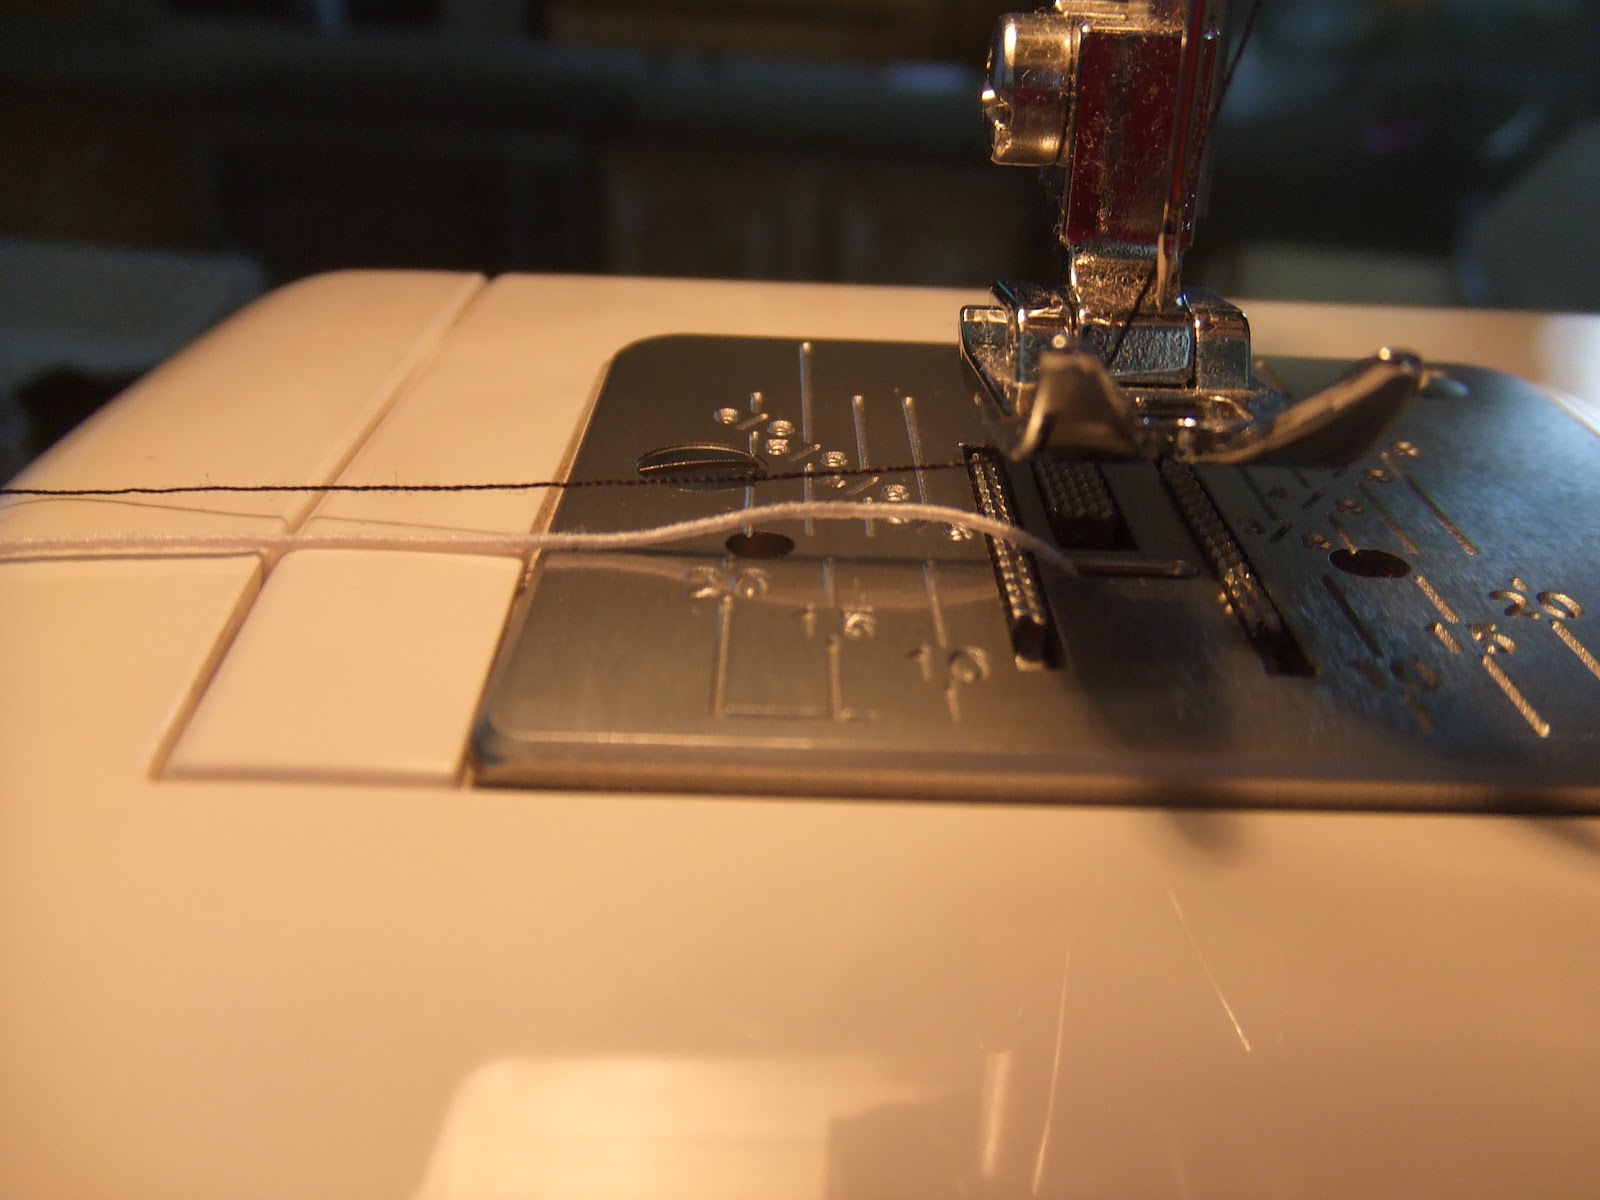
9. Now for the sheering...it is sooooooo easy! Don't be afraid! Replace bobbin thread with elastic thread. Just hand wrap elastic thread around bobbin so it sits on there nicely, not tight, not loose. Normal thread on top.
Now, you are going to sew 10-12 rows (whatever your preference I did 12 for the black and white dress, 10 for purple seen below) around the the top of skirt portion of dress. Watch the video:
As I said in the video, back stitch at the beginning and end of every row, never cutting thread. You can cut it if you want to but you will waste more thread. Not cutting the thread is so much easier!

If you want to add trim to the middle, like I did, add it now. You can just baste it on.
10. Sew together bodice and skirt. Make sure right sides are together.

11. If you want to embellish with a flower like I did, I did a basting stitch on the flat side of the trim, pulled it into circles, and sewed it together, adding a blingy button in the middle. I sewed it onto the dress and added a little fabric glue to get it to lay just how I wanted it.
Now you are done! You will see in the purple dress I added a ruffle instead of the flower. I didn't like it as much so I didn't include instructions. It was hard to do and added complexity. Maybe I did it a wrong way.

Also, the black and white dress is for 18 months and my daughter is only about 13 months in the picture (that's why the dress is a little big--wanted her to grow into it). The purple dress is 12 months (that's why it fits so much better).

Thursday, August 23, 2012

All Over the Piano

I decided to take music off of this blog and just leave that to my new revamped site for my music. Check it out:

All Over the Piano

Monday, August 20, 2012

Unbroken


Our book group just read this AMAZING book. It is a non fiction story of a WW2 POW. What I like about it, is that it reads like a fiction novel--so gripping. The whole time you are reading it you can't believe this stuff really happened. Who knew one man could experience so many miracles in a lifetime? Every book group should read this! Lots of good discussion.
We weren't in charge of the games this time but I got a hold of the games we used and here they are.
For refreshments pie was served. Louie, the main character steals pies when he was a kid. You can either serve pie or rice balls...or shark liver. I'll let you pick!

Saturday, July 14, 2012

Mexican Rice

I have a friend who grew up in Mexico teach me how to make Mexican rice, so it is authentic! The only thing was, when she was teaching me she didn't give any specific measurements. She would hold up a spoon and say, "One spoonful of butter." Ha! I loved that! I love cooking like that. However I made up my own measurements so you could have a real recipe.
The special ingredient is chili con limone (pictured above). The brand I found was Tajin. It was sold by the fruit, though I personally wouldn't put it on fruit. I really think this is what made it taste really good! Here's the recipe:

Mexican Rice:
3 TBSP butter or margarine
1 cup long grain white rice
1/4 cup chopped onion
2 cups chicken broth
1 8oz can tomato sauce
3/4 tsp garlic salt
1/2 tsp cumin
1 tsp chili con limone (see description above)

1. Melt butter, add rice and raw onions. Stir frequently until rice is browned. While browning add in seasonings: garlic salt, cumin and chili con limone.

2. When rice is browned immediately add in broth and tomato sauce. Bring to a boil. Cover and turn to low.

3. Cook for 20-25 minutes, until water is evaporated. Fluff and serve!

Monday, June 18, 2012

Frosted Pane Skirt


Sewing in no man's land is such a great blog! This is my Frosted Pane Skirt. I like to call mine the Cotton Candy Skirt because of the colors of the fabric I used. Here is a link to the skirt tutorial. I thought I would include a picture of how I added on the lining with tulle. I actually sewed my lining into the waist seam. I just liked it better there. I also didn't do the tiering.

My word of advice is to cut really long strips of tulle. Mine were shorter and I ended up making a fourth layer of really long tulle because mine wasn't gathered enough for my taste. I think it turned out so cute!

Enchantment

 
Our book club read Enchantment by Orson Scott Card. First off, this is a PG-13 book. While reading we probably skipped a total of about 5 pages. It frustrates me to no end how authors add in inappropriate stuff to a good book.
That being said, I liked this read. It takes a few chapters to really get into it but once you do, the plot moves along well. If you haven't read Card before, know that his imagination is wild. There are some crazy things in his book and you wonder why he wrote them. I take Card with a grain of salt.
Things I liked:
  •  It is a good romance book--one where the couple has to learn to like each other. At the same time it wasn't too much romance, my husband is not a romance novel kind of guy AT ALL and he enjoyed the book.
  • It has a great antagonist--Baba Yaga. I have never met an evil character quite like her. It is so funny to read about her reasoning for why she is evil and little things she does.
The ending is brief. There is a war and it is over quickly but I was alright with that. The story proficiently built up to the ending.
Activity
I made a list of quotes. I read a quote and as soon as someone knew who said it they raised their hand and said their answer. If they were right they got a point, if not I kept reading and someone else could win the point. Sometimes a person could guess who the character was but not the name. If someone else could guess the name I gave both people a point. I had the people keep track of their own points. Most points wins!
Here is a link to the quotes I used and who said them, sorry I don't have page numbers. I forgot to do that and didn't want to go back to find the quotes again.
Treats
I made "Molotov coctails" with IBC Rootbeer, a rubber band and a white piece of cloth. I went to the fabric store and found the cheapest white cloth they had. I rubber banded one end of the cloth to the bottle then flipped the cloth over the other side so you couldn't see the rubber band.


Another idea, though I didn't do it, was to make a cake and put a toy wasp or bee on it.

Thursday, May 24, 2012

Chocolate Dipped Rice Krispie Treats


The easiest dessert to make is rice krispies. They are good by themselves but dip them in chocolate and they get even better and look pretty.
-Here's the recipe to rice krispies (I add about a 1/2 to 3/4 cup extra marshmellows).
-After cooled, cut them into bite sized pieces and put in a toothpick.
-For the chocolate I melt about 2 cups of semi sweet chocolates with 2 TBSP of shortening (to give it a glossy look) on low heat until almost all of chocolate chips are melted. Turn off heat and keep stirring until all chips are melted.
-Dip rice krispie treats in chocolate and set on wax paper to cool completely. Serve treats with toothpick in or out, you decide!
Tip: I gave some away to a friend and froze them for about 10 minutes right before I left so the chocolate wouldn't melt.